Featured post

Pentewan Light Railway

The Pentewan Railway in Cornwall was possibly unique in having three* gauges in its lifetime. Christopher Hawkins built the original rai...

Showing posts with label Construction. Show all posts

Monday, 20 October 2014

Here's hoping it's worth it

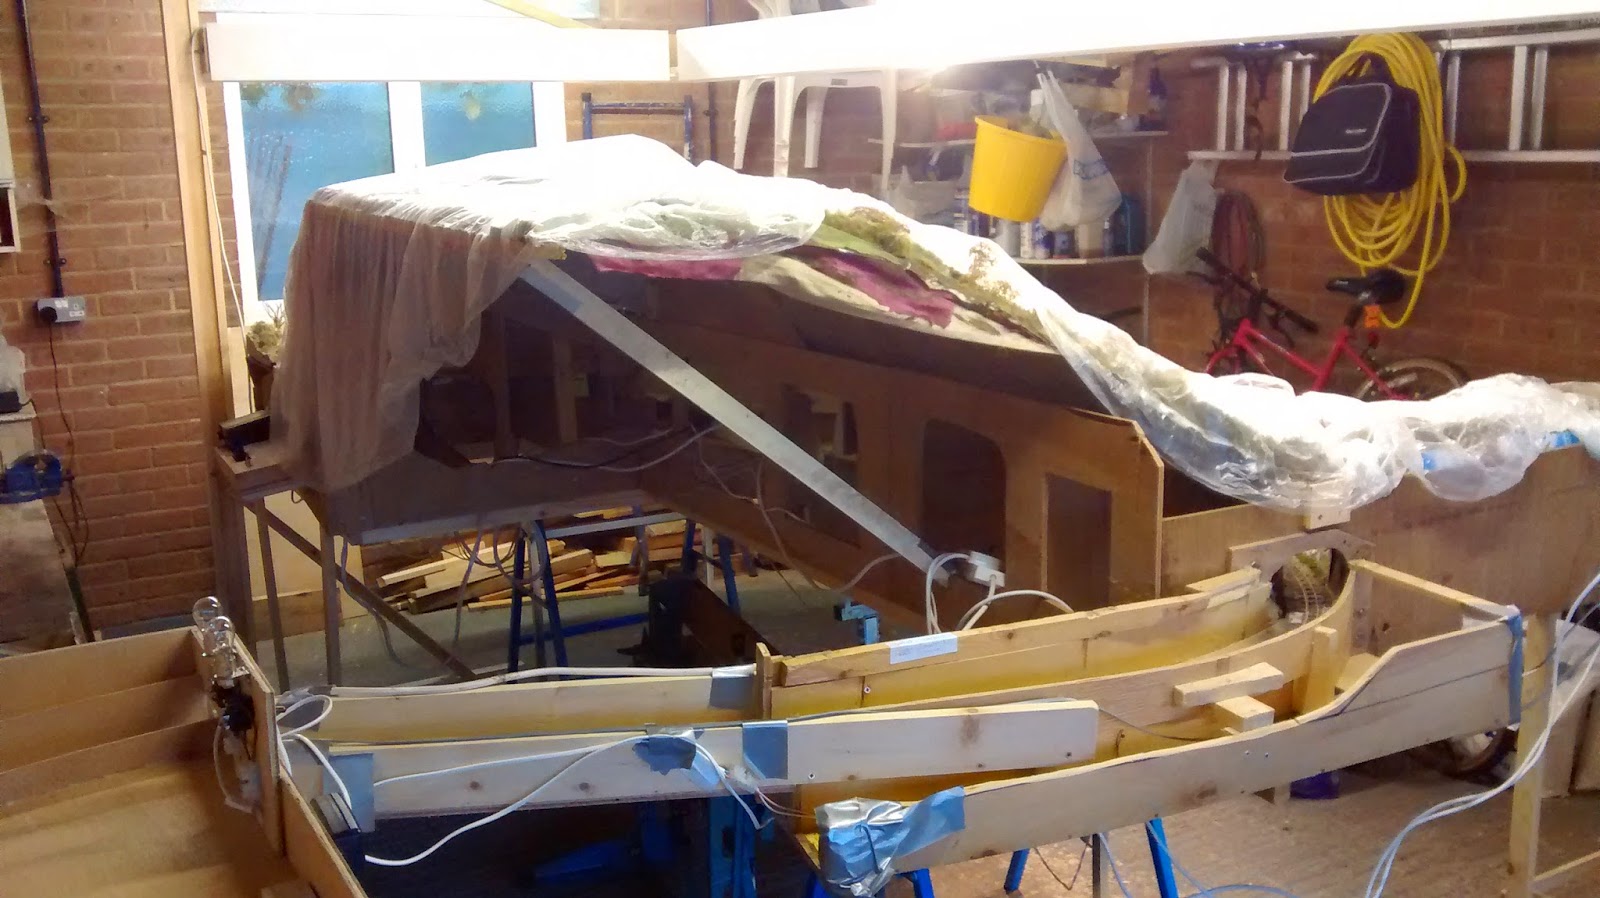
With just a few days to go, the construction of temporary staging, fiddle yard, traverser, lighting gantry, etc. is all complete. There is more trackwork behind the scenes than in front - all just one show!


The last push will be to try and get some more wagons ready and a few more running trials.

Saturday, 9 August 2014

Getting wet

The time had finally come to get some water into the stream and leat. The intention was to use one of the poured water systems and after some research I settled on Magic Water which I acquired from EDM models.


I of course read the instructions fully before using it (didn't I? - oh!) so took all the necessary precautions to avoid any issues - but:
  • It leaked. It shouldn't have - I had tested it with water several times, each time plugging all the leaks with waterproof PVA, varnish etc. It didn't leak that much but luckily most of the drips fell on the newspaper which was still down from the prior leak checks. I think one of the problems is it takes hours to set so has plenty of time to ooze through any tiny holes.
  • There were very prominent meniscusses (menisci?) especially along the leat and around the viaduct piers. This was partly a result of wicking into porous scenery and vegetation (as noted in the instructions), and also possibly through loss of resin, i.e. the meniscus was the high tide and the level went down slightly through the leaks.
 The instructions suggest the water feature should be made before you do the rest of the scenery, and any porous scenery should be prepared with a thin paint of Magic Water along the waterline. This is all very well but it meant I should have done it 12 years ago. And in this time the plans have changed - the large waterwheel and launder having been (perhaps temporarily) abandoned when it became clear they were never going to be built in time for the big outing.

I tried to cover up the meniscus with vegetation but it was simply too prominent, and vegetation would not look right around the bridge piers etc. The resin sets to a rubbery state so it could not be easily scraped away - and it would probably have made it look worse. I eventually decided it needed a thin top coat. I reasoned that it had done any leaking and wicking that it was going to do, so this thin top coat should hopefully just fill the surface up to the top of the menisci. Of course I had now used up all the Magic Water.


A bit of late night internet searching showed there were several suitable clear resins - all quick setting which should enable corrective action to be taken during whilst it sets. I contacted Eli-Chem Resins UK who sold two types at a reasonable price. As a result of their helpful advice I ordered a General Purpose Clear Epoxy 350g starter kit - despite choosing their standard 5 day delivery it arrived the very next day!

I dribbled a thin coat into the middle of the leat and worked it into place with a spatula to just fill the meniscus. When it started to thicken up I carefully swept any build up away from the edges with a small coffee stirrer.

The result is much better. The top coat has set very clear with a hard glass like finish and the menisci are far less prominent. What remains can easily be hidden with some judicous planting.


(After planting - clearly it now needs a hoover)


Friday, 27 June 2014

Signs

With some helpful info and advice from my friends on the O14 Group I have made some mileposts and whistle boards. I have decided not to make gradient posts - the PLR crew knew exactly where the big hill was!


Friday, 21 February 2014

More scenery

I am progressing well with the scenery. My thoughts are if I start at the very back I can learn the techniques that work for me and hopefully I will have improved enough by the time I get to the front.  I have tried to introduce a bit of false perspective on the very back section with smaller hedges and 4mm scale cattle and gates.

I have deliberated long and hard on how to represent bracken with some areas of old dead stuff and others still growing - I have the photographic evidence if anyone doubts this. I used a base of lichen for the dead stuff with selected Scalelink fronds added in here and there, and whole Scalelink plants for the still growing plants. I possibly need to add a few more of these. I used a blowlamp to curl the tips slightly in an effort to make them more realistic. Painting was with acrylics (on grey primer) and then touched up with watercolours.

Friday, 17 January 2014

Hedges (walls if you are from up Country)

Experiments continue on hedging. The basis is corrugated cardboard stuck down with a hot glue gun and then coated with a gloop made from slightly diluted PVA and lots of loo paper coloured with a big dollop of raw sienna goache (yes it looks like what one could find down a sewer but obviously without the smell). This is trowelled on with an icing knife. It stays soft and sticky for days giving plenty of time for adjustments but will eventually dry hard and strong and is very light.

The following photos were the result of a couple of hours spent adding rocks to simulate a typical moorland type granite hedge. The stones are coloured filler/PVA mix spread out to dry on foil then broken up by hand and pressed into the gloop. Static grass was added with a puffer and some scatter and foam added by hand.

I'm pleased with the stonework and from a distance the vegetation looks reasonable but the close-ups show the grass is not ideal. When it eventually dries I may clean it off a bit with a toothbrush and then apply rough grass (carpet underlay and/or plumbers hemp), bushes (a la Gravett) and static grass (properly).


I've also included a photo of the trunks under development (again a la Gravett) of some more substantial bushes which grow out of another section of hedging.

Monday, 13 January 2014

First attempts at Scenery

I have at last starting on some flora - I also have some fauna to add (a nice Christmas present from one of my daughters). This is the first time I have done any scenery for over 20 years and all those previous attempts never saw completion, so I am have to learn all over again. Rough grass is proving to be a challenge and I suspect I will need to have several throw-away attempts before I am happy with the results. Similarly with Cornish hedges. The following photos are some of the early attempts which will I think be scrapped and restarted soon.


They also show a mock-up of a wooden crane. I think I've accepted that there's no chance of me completing the intended lattice metal jib crane by October, so it will have to be a temporary wooden one (hopefully more convincing than my mock-up).

Sunday, 22 December 2013

Bridges and Sheds

Progress has been slow but I have installed parapets on the remaining two bridges and some walking boards so the PLR track gang should hopefully be a bit safer (although this was the 1950s).

This shot also shots the quarry engine shed. This has been made with scale corrugated iron sheets from (IIRC) Metalsmith with 1/16" square brass for the main frame and wooden strips for the rest. The corrugated iron fairly quickly started rusting after soldering, but as there were still shiny bits I painted it with gun blue and then washed it off. The next day the whole outside was totally rusted. Whilst the rust looks good I'm not sure if all of every sheet would be like that in the prototype, so I am deliberating if I should try and paint on some grey in places to represent non-rusty areas.

I have some more corrugated iron buildings to make so may try and paint bits of the sheets first, or at least before wielding the gun blue.

Thursday, 28 November 2013

Progress on the quarry and leat

The last two weeks have seen the ballasting completed on the quarry board and numerous small scenic enhancements.


The quarry entrance gate - it will be a Cornish hedge to the left.


One of the next major tasks is to complete the river and leat. This is one of the sluice gates (well a pair in fact).

Friday, 18 October 2013

A Major Milestone Achieved

With just over 53 weeks before it's outing (you can probably guess where now) I have finished the quarry trackwork which completes all the trackwork for the section that will be displayed.
As per my usual practice I then separated the board and strung it up on some large hooks installed for this purpose - this makes it much easier to do the wiring. I then realised I didn't have enough point motors!
Of course there are still new boards and trackwork for the hidden sections and fiddle yard to be made, lots of scenic work, more rolling stock to be built, etc. - it will be a busy winter!

Thursday, 26 September 2013

Going Industrial

The PLR is of course a 'main line' narrow gauge railway even if it was built on a shoestring. However, there is one corner where typical O14 industrial narrow gauge can rule which is the granite quarry. Some of the track was laid a while ago using code 82 Peco Il-115 which I know is the recommended rail for the Roy C Link/KBscale track, but I felt a lighter rail would be more appropriate and give a visual contrast to the adjacent main line, so I am relaying it in Micro Engineering Code 55 rail. You will note I have used wooden sleepers as most of the quarry trackwork I have seen did too.

I have now completed the two sets of pointwork of which the latter is the most complex (I'm not sure what you call this arrangement). Just a bit more plain track to add and I will have completed all the trackwork for the scenic section ready for it's outing next year (but not all the hidden track that will be required).

I hope to show some final pictures once it is completed and ballasted.


Wednesday, 15 May 2013

Telegraph Poles

Over the last month or two I have been attempting to install telephone poles on the PLR. The idea is that there is a circuit going down the line with a telephone on a pole at the quarry loop (to discuss their traffic requirements). In practice this means a two wire circuit down the line to the viaduct at which point the main circuit crosses to the lower line and through the tunnel, and the original wires continuing to an end pole on the quarry loop.

In my hunt for prototype inspiration I came across the following wonderful sites: Teleramics, Double Groove and Telegraph Pole Appreciation Society (I defy anyone to call railway modellers sad after seeing this: here)

I was particular taken with the swan neck type of insulator fitting from Double Groove below as I thought it would be appropriate (cheap) for the forever strapped for cash PLR.
Image linked from Double Groove

After queries on the O14 group etc. for suitable sources drew a blank I started out making my own as outlined below (I was beyond the point of no return when I found out Wenz Modellbau did some kits) .

I ended up getting a casting starter kit from Nigel Lawton 009 and making a master with 4 insulators on it from which I made a silicon mould. Trying to cast with resin (with various colouring agents) proved almost impossible due to air bubbles and the very fast cure time. Coloured (artists pigment) 12minute epoxy was better, but the best results were with white/superfine Milliput. Piano wire was used for the swan necks poked into the Milliput.

Poles were made from dowels, slightly tapered with sandpaper, aged with my cider vinegar/steel wool solution (see previous post), felt tip for knots, and washes with ink and watercolours. The bases have a square rod which fits into a square tube in the basement so they all line up correctly (every pole has it's place), and all were given a yellow/green algae spray on the North East face. Caps were made from cartridge paper painted with grey acrylic mix. The guy ropes were made from fine electric wire innards blasted with a blowtorch to blacken it.

IMG_8578s
The master, silicone mould(s) and swan neck wires.

IMG_8580s
Casting a batch of insulators.

IMG_8583s
Clockwise from top left: Resin (least successful - many bubbles/failures), Epoxy (better) and Milliput (most successful - shown as moulded)

And the final results:

IMG_8640s

IMG_8637s

Adding the poles has certainly transformed the look of the layout. I think it adds a visual dimension that highlights the narrow gauge. I am still deliberating whether I add any wires.

Now for some fencing and vegetation....

Tuesday, 23 April 2013

Ageing Wood with Cider Vinegar

I'm slowly making a set of telegraph poles for the PLR and particularly want to try and reproduce that rather elusive aged and weathered look. As start I thought I would try and age the wood itself with a suitable potion. A bit of googling turned up a recipe for a home made potion made from vinegar and iron filings. I ended up using organic cider vinegar (nothing but the best for PLR - actually it turns out to be stronger than red wine vinegar which was the only other thing in the kitchen cupboard) and steel wool left to stew for a couple of days. I tried using several dilutions of this on a piece of dowel as shown below:

From left to right dilutions of: 1:4, 1:3, 1:2 and 1:1. I felt the 1:2 looked best so then tried this on a full sized pole and also several other pieces of wood as shown below:

From left to right: treated and untreated dowel poles, thin and thick coffee stirrers and finally Scale 7 group walnut sleepers.

In many respects the dowel poles was the least successful as they still have a decidedly yellow tinge but I think further painting and weathering will tone this down. The coffee stirrers have a really pleasing grey hue which I am sure I will take advantage of sometime - it actually makes me wish I had done all my sleepers like this rather than my usual potion of Jacobean dark oak stain. The most surprising effect was on the walnut sleepers which have become almost as black as ebony.

They all smell slightly of vinegar and must be still acidic, so I'm wondering whether I should try and neutralise this using Bicarbonate of Soda (another kitchen find) or whether this may ruin the effect. Perhaps another test is due.

Monday, 31 December 2012

Ballasting

This winter has seen me finally get around to ballasting. I started on the big scenic section which is destined to be exhibited in 2014 but was so pleased with the results that I vowed to get rid of as much of the yellow peril foam underlay as possible. I realise having this colour everywhere for so long was really getting to me and colouring (sorry) my judgement. With hindsight I wished I had painted the foam grey or suchlike before any sleepers were laid.

I needed to ensure the ballasting did not affect the ability of the track to float on the underlay which rules out PVA which would have locked it up solid. Luckily Copydex which is flexible, can be diluted and used in much the same manner. Tests done some years ago proved it works, however some ballast has come away in places possibly because it was applied too thinly. This time I set out to find the optimum methods and glue mix.


A lot of the PLR was ballasted with china clay waste as it was cheap and readily available. Earlier this year someone mentioned both chinchilla dust and sieved cat litter as suitable and cheap ballasting materials. Having acquired a bag of each, I then had to dash both my daughters' hopes as to the true purposes of my purchases - they are still demanding the appropriate animals be acquired.


I thought about making a ballast spreader of the type both commercially sold and similar DIY versions, but in the end a teaspoon, fingers and a cheap small paintbrush ended up being the best method of spreading. I laid ballast on about 9 yds of track length with pointwork in a couple of hours. In places I followed a useful tip from a forum somewhere, which was to paint neat glue alongside the track which holds the sprinkled ballast in place.

I had read that diluted IPA (Isopropyl alcohol, not the type of beer) was a good wetting agent and dilutant. It might be for PVA but not Copydex - adding some to a Copydex/water mix almost instantly formed a large ball of solid rubber. Dripping diluted Copydex into an IPA wetted ballast produced similar surface lumps.  I also tried screen wash as a dilutant with no perceivable benefits, so resorted to good old washing up liquid. I made up a decent quantity of water with a generous slug of washing up liquid in it (you could see the colour) and then used that in my spray bottle and to dilute the Copydex, mixing the latter only when about to be used. I didn't measure the ratio used but is probably more than 10 parts water to 1 part Copydex, i.e. very thin, like skimmed milk.


My first spray bottle sputtered out blobs too which rather upset my carefully laid ballast - especially the chinchilla dust. My daughter suggested trying a chemist and I found a small pump action spray for £1.59 which produces a gentle mist. The final technique was to mist something like 12" ahead and follow in a zig-zag fashion with diluted Copydex using a dropper between each set of sleepers between, and either side of the rails, and trying to avoid the sleeper tops and rails themselves, using enough so the ballast fills up with the water/glue mix (as if swamped with milk). To ensure it is properly stuck down (and as the mix is so thin) I repeated the glue dropping the next day before it had dried out. In fact it took several days to completely dry out and as I discovered it also forms a very effective short circuit until dried.

Both the cat litter and chinchilla dust darken when wet. The cat litter also seems to expand a little so some tamping down was done whilst still wet. When dried it reverts to the original natural colours, so much so it looks like it is still loose, but a quick prod will show it is not. To finish off I cleaned the railhead with a block of MDF and then my leather strip rail cleaner (I never use anything abrasive) and some scraping of sleepers and cleaning out the point flangeways etc., interspersed with hoovering. As it is very flexible it is also possible to squash down any raised ballast lumps.

Before
And after (the gully will be weathered and varnished in due course)

Rust stains have appeared in places from the spikes specially when the ballast has (intentionally) covered the sleepers. I think this can be hidden as part of weathering which will be final stage - along with planting some vegetation/weeds etc.

Sunday, 11 November 2012

Extension boards under construction

The boards for the big extension under construction in the early 1990s. Each board is a unique (odd) shape designed to be small enough to go through the loft hatch and also keep joints at right angles to the track.